


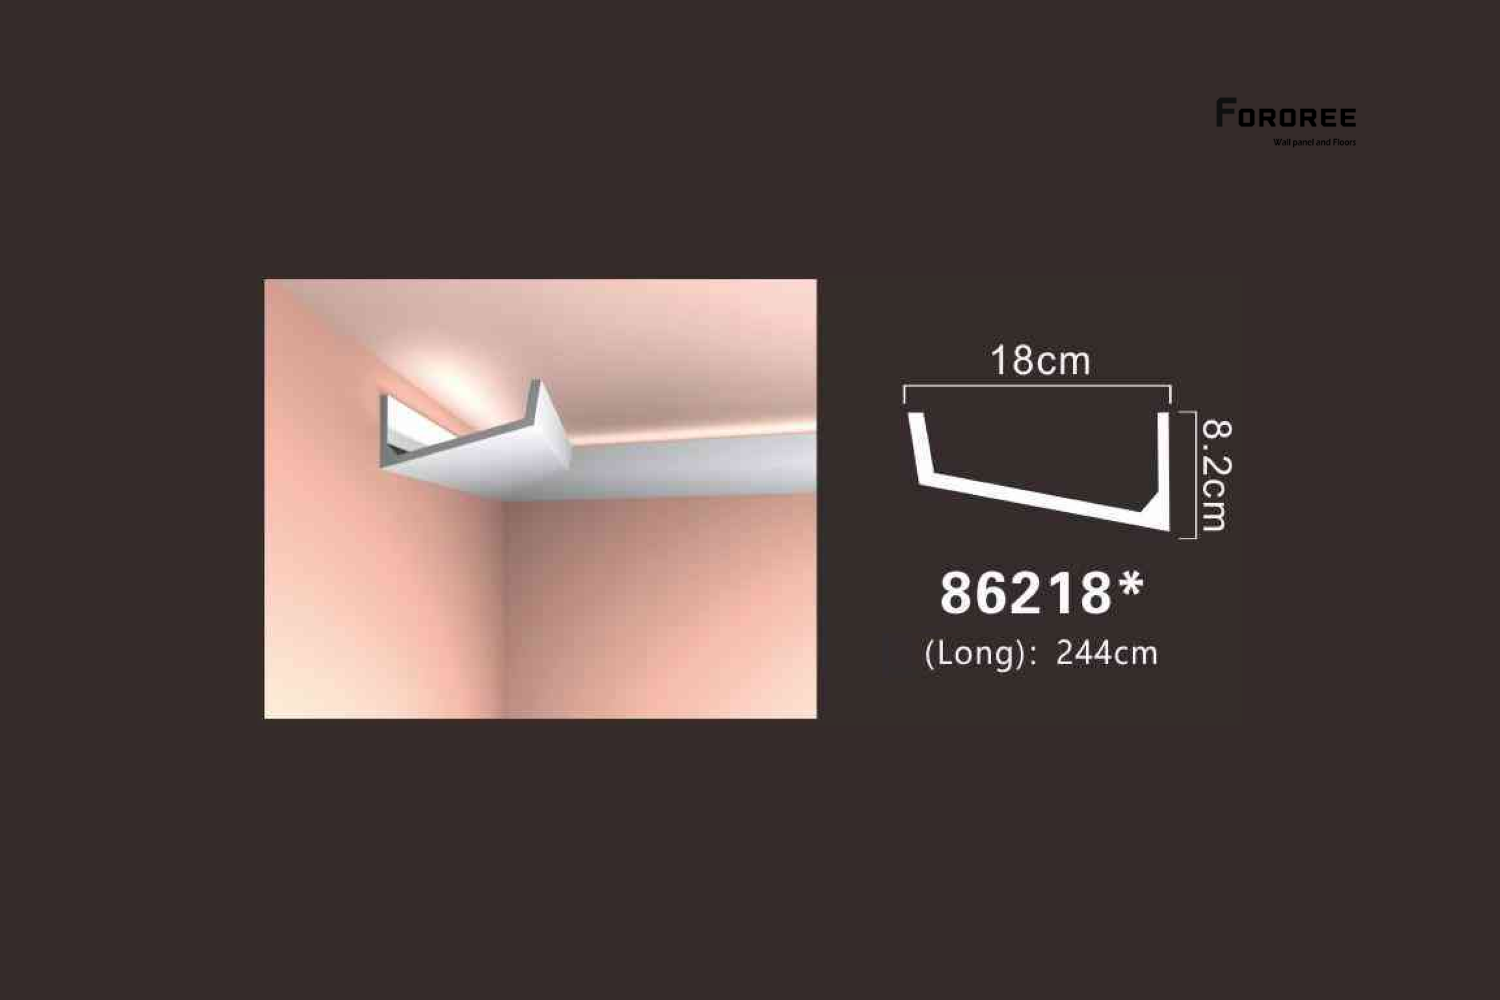
Installing a PU cornice is simple and can be done without professional tools. Here’s how:
Measure & Cut: Measure the wall length and cut the PU cornice to size using a fine-tooth saw or miter box for perfect angles.
Apply Adhesive: Use a strong construction adhesive or PU glue on the back of the cornice and along the edges.
Fix & Finish: Press it firmly to the wall and ceiling, wipe off excess glue, then fill joints or gaps with caulk and paint if needed.
This process is quick, clean, and much easier than installing plaster moldings.