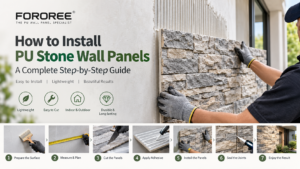
Installing PU stone wall panels is generally faster and easier than installing traditional natural stone or heavy masonry materials. Because PU panels are lightweight, easy to cut, and available in large decorative formats, they are suitable for feature walls, residential interiors, commercial spaces, villas, exterior walls, garden walls, and other decorative applications.
However, good installation results depend on more than simply applying adhesive to the back of the panel. The wall surface, adhesive system, cutting method, panel layout, joints, and weather conditions all affect the final appearance and long-term performance.
This guide explains how to install PU stone wall panels step by step and highlights the key points installers, contractors, distributors, and project buyers should know.
What Are PU Stone Wall Panels?
PU stone wall panels are decorative wall panels made primarily from polyurethane and molded to reproduce the appearance of natural stone, brick, rock, or other architectural surfaces.
Compared with traditional stone, PU panels are much lighter and easier to handle. They can usually be cut with common woodworking or construction tools, making them suitable for both renovation projects and new construction.
Depending on the specific product construction and technical specifications, PU stone panels may be used for:
- Interior feature walls
- TV walls
- Bedrooms and living rooms
- Restaurants and retail spaces
- Hotel interiors
- Villa walls
- Exterior feature walls
- Garden and courtyard walls
- Fence walls
- Commercial façades
Always check the manufacturer’s technical documentation before using a specific PU product outdoors or in special environments.
What You Need Before Installation
Before starting the project, prepare the following tools and materials.
Basic Tools
- Measuring tape
- Pencil or marker
- Level
- Straightedge
- Utility knife
- Saw or cutting tool
- Caulking gun
- Drill, when mechanical fixing is required
- Cleaning brush or cloth
- Protective gloves
- Safety glasses
Installation Materials
The exact materials depend on the panel design, substrate, and installation environment.
Common materials include:
- Suitable construction adhesive
- PU-compatible sealant or joint filler
- Primer, if required by the adhesive system
- Screws and anchors, where mechanical fixing is specified
- Touch-up paint or matching coating
- Cleaning materials
For exterior applications, choose an adhesive and sealant system specifically suitable for the expected temperature, humidity, substrate, and weather exposure.
Step 1: Check the Wall Surface
The first and most important step is preparing the substrate.
The wall should be:
- Clean
- Dry or within the moisture limits specified by the adhesive manufacturer
- Stable
- Free from loose dust
- Free from oil and grease
- Free from peeling paint
- Reasonably flat
Typical substrates may include:
- Concrete
- Cement render
- Masonry
- Gypsum board or drywall
- Plywood or suitable boards
- Existing stable wall surfaces
Remove loose materials, dust, dirt, and flaking coatings before installation.
If the wall has serious cracks, moisture problems, structural movement, or an unstable surface, these issues should be corrected before installing the PU panels.
Important for exterior walls
Outdoor walls require additional attention because the panels may be exposed to:
- Rain
- Sunlight
- Temperature changes
- Wind
- Humidity
- Freeze-thaw conditions in some regions
Do not install over a wall with unresolved water infiltration or structural problems.
Step 2: Measure the Installation Area
Measure the total wall width and height and calculate the approximate coverage area.
For irregular walls, doors, windows, corners, and columns, measure each section separately.
It is good practice to order or prepare some additional panels to account for:
- Cutting waste
- Pattern matching
- Damaged pieces
- Future repairs
The required extra quantity depends on the complexity of the project and panel design. Simple layouts usually require less waste than highly irregular walls.
Step 3: Plan the Panel Layout
Do not start applying adhesive immediately.
Dry-lay several panels first to determine how the pattern will look.
This is especially important for PU stone panels with:
- Irregular stone patterns
- Repeating textures
- Strong color variations
- Large geometric designs
- Horizontal or vertical directional patterns
Plan around windows and doors
Try to avoid very narrow pieces around openings when possible.
Instead, adjust the layout so that the cuts are balanced and visually natural.
For stone-look panels, it is usually better to avoid obvious repeated lines or patterns that make the wall look artificial.
For modern geometric panels
For geometric and contemporary PU wall panels, alignment is particularly important.
Check:
- Vertical lines
- Horizontal lines
- Pattern continuity
- Panel orientation
- Joint spacing
A small layout error can become much more noticeable when a geometric design is repeated across a large wall.
Step 4: Cut the PU Stone Panels
One of the major advantages of PU wall panels is that they are relatively easy to cut compared with many traditional stone products.
Depending on panel thickness and construction, installers may use:
- Utility knives
- Fine-tooth saws
- Circular saws
- Other suitable cutting equipment
Always follow the manufacturer’s recommended cutting method.
Make clean cuts
Measure twice before cutting.
For visible edges:
- Use a straightedge for accurate lines.
- Support the panel properly.
- Avoid crushing the decorative surface.
- Test the cutting method on a spare piece first.
Keep cut pieces that may be useful around:
- Windows
- Doors
- Corners
- Columns
- Electrical boxes
- Small wall sections
Step 5: Apply the Adhesive
Apply the recommended adhesive according to the adhesive manufacturer’s instructions.
The application method depends on the product and substrate.
For some systems, adhesive may be applied in beads, strips, dots, or a full coverage pattern. The goal is to achieve sufficient contact between the panel and the substrate without creating unnecessary voids.
Do not use too little adhesive
Insufficient adhesive contact can reduce bonding strength.
Do not use an incompatible adhesive
Different PU products may have different surface constructions and requirements. The adhesive should be compatible with both the panel and substrate.
For commercial and exterior applications, it is advisable to test the proposed adhesive system before starting full-scale installation.
Step 6: Fix the First Panel
The first panel is critical because it establishes the alignment for the rest of the wall.
Position the panel according to your planned layout.
Use a level to check:
- Horizontal alignment
- Vertical alignment
- Panel position
- Joint location
Once correctly positioned, press the panel firmly into place according to the adhesive manufacturer’s instructions.
If the project requires mechanical fasteners, use the recommended screws, anchors, or fixing method.
Mechanical fixing may be particularly relevant for certain exterior, high-wind, heavy-duty, or project-specific applications.
Step 7: Continue Installing the Panels
Continue installing the remaining panels according to the planned layout.
Pay close attention to:
Panel alignment
Make sure adjacent panels remain aligned.
Joints
Keep joint width consistent where the design requires defined joints.
Pattern continuity
For stone-look designs, rotate or position panels where necessary to avoid an obvious repeating pattern.
Pressure
Apply even pressure to establish good contact without damaging the decorative surface.
Regularly step back and inspect the wall from several meters away. This helps identify pattern problems that may not be obvious when standing directly in front of the panel.
Step 8: Install Corners and Difficult Areas
Corners require careful planning.
Depending on the product, you may use:
- Corner pieces
- Folded or formed pieces
- Cut panels
- Multiple-piece corner construction
For windows, doors, columns, and other complicated areas, measure carefully before cutting.
Exterior corners
Exterior corners are particularly visible and should be designed before installation begins.
A poorly planned corner can make an otherwise high-quality wall look unfinished.
For outdoor projects, all exposed transitions should also be properly sealed according to the manufacturer’s recommendations.
Step 9: Treat the Joints
The treatment of joints depends on the panel design.
Some PU stone panels are designed to create a continuous stone appearance, while others intentionally use visible joints.
Possible joint treatments include:
- Matching sealant
- Decorative filler
- Color-matched coating
- Manufacturer-recommended joint products
The purpose is not simply to fill a gap. A well-treated joint should visually integrate with the surrounding texture.
For stone-look panels, joint color can strongly affect the overall appearance.
Tip
Before filling all joints, test the selected color on a small area.
A joint color that looks correct on a sample may appear significantly different across a large wall.
Step 10: Touch Up the Cut Edges
Cut edges may expose the internal material or create a visible transition.
Depending on the product, installers may use:
- Matching paint
- Touch-up coating
- Manufacturer-supplied repair materials
- Compatible sealants
The goal is to make the cut edge visually blend into the panel.
This is especially important around:
- Windows
- Doors
- Corners
- Open ends
- Top and bottom edges
Step 11: Seal Where Required
For exterior installations or areas exposed to moisture, appropriate sealing may be required.
Possible locations include:
- Panel joints
- External corners
- Window and door interfaces
- Wall penetrations
- Top edges
- Bottom edges
The sealant should be compatible with the panel and substrate and suitable for the environmental conditions.
Avoid assuming that every PU panel has the same weather-resistance or waterproofing performance. The actual performance depends on the complete product construction and installation system.
How to Install PU Stone Panels on Exterior Walls
Outdoor installation requires more attention than a typical interior feature wall.
Before installation, confirm:
1. The product is approved for exterior use
Not every decorative PU panel is designed for outdoor exposure.
2. The substrate is suitable
The wall must be structurally sound and properly prepared.
3. The adhesive is exterior-rated
Choose a bonding system suitable for outdoor temperature and moisture conditions.
4. Mechanical fixing is considered
For some projects, additional mechanical fastening may be recommended or required, especially where wind load, building height, substrate conditions, or local construction requirements make it necessary.
5. Water drainage is addressed
Do not trap water behind a decorative wall system.
6. Exposed joints and edges are sealed appropriately
Water entry often occurs at transitions, penetrations, and poorly sealed edges rather than across the decorative face itself.
Always follow project specifications, local building requirements, and the panel manufacturer’s installation instructions.
Can PU Stone Panels Be Installed Over Existing Tiles?
In some renovation applications, PU panels can be installed over an existing tiled surface, provided that the tiles are firmly bonded, clean, stable, and compatible with the selected adhesive system.
However, loose, hollow, cracked, or unstable tiles should not be treated as a reliable substrate.
The existing surface may also require:
- Deep cleaning
- Degreasing
- Surface preparation
- Sanding or roughening
- Primer
Always test adhesion before installing over an existing finished surface.
How Long Does PU Stone Panel Installation Take?
Installation time varies depending on:
- Panel size
- Wall complexity
- Number of corners
- Number of windows and doors
- Surface preparation
- Installation method
- Installer experience
- Joint treatment requirements
Compared with traditional stone, lightweight PU panels can significantly simplify handling and cutting.
However, a professional installation should never sacrifice substrate preparation or alignment simply to reduce installation time.
For commercial projects, estimating should include:
Preparation + Layout + Cutting + Installation + Joint Treatment + Touch-Up + Sealing
This gives a more realistic understanding of total installed cost.
Common Installation Mistakes to Avoid
Mistake 1: Installing on a dirty wall
Dust and grease can reduce adhesive performance.
Mistake 2: Skipping the layout stage
Starting from the first panel without planning can cause poor alignment or awkward cuts.
Mistake 3: Using the wrong adhesive
An incompatible adhesive may lead to poor bonding or long-term failure.
Mistake 4: Ignoring moisture problems
A decorative panel cannot solve an underlying wall leak.
Mistake 5: Using too many identical pieces together
This can create an unnatural repeating pattern.
Mistake 6: Neglecting corners
Corners are one of the most visible parts of an installation.
Mistake 7: Failing to treat cut edges
Unfinished cuts can make the project look less professional.
Mistake 8: Assuming all PU panels are suitable for outdoor use
Exterior suitability must be confirmed from the specific product’s technical information.
PU Stone Wall Panel Installation: Interior vs Exterior
| Factor | Interior Installation | Exterior Installation |
|---|---|---|
| Surface preparation | Important | Very important |
| Adhesive | Suitable construction adhesive | Exterior-rated system |
| Moisture control | Moderate | Critical |
| Weather resistance | Usually less demanding | Product-dependent |
| Mechanical fixing | Project-dependent | May be required |
| Joint sealing | Design-dependent | Often more important |
| UV exposure | Usually limited | Important |
| Wind load | Usually not a major concern | Must be considered |
| Building requirements | Project-dependent | More likely to apply |
How to Choose a Reliable PU Wall Panel Manufacturer
Before purchasing PU stone wall panels for a project or importing them for distribution, buyers should ask the manufacturer for more than product photos.
A reliable supplier should be able to provide information such as:
Product information
- Product dimensions
- Thickness
- Weight
- Material construction
- Available colors
- Surface textures
Technical information
- Installation instructions
- Adhesive recommendations
- Exterior-use information
- Applicable test reports, where available
- Maintenance recommendations
Commercial information
- MOQ
- Sample policy
- Production lead time
- Packaging
- OEM/ODM options
- Container loading information
- Export experience
Quality control
Ask how the factory controls:
- Thickness
- Weight
- Dimensions
- Color consistency
- Surface texture
- Packing quality
- Finished product defects
For large projects, requesting physical samples before placing the final order is strongly recommended.
Frequently Asked Questions
Is PU stone wall panel easy to install?
Compared with many traditional stone products, PU wall panels are generally lightweight and easier to cut and handle. Installation difficulty still depends on the product design, substrate, layout, and project conditions.
Do PU stone panels need cement mortar?
Not necessarily. Many PU panels are installed using suitable construction adhesive or a manufacturer-approved adhesive system. The exact method depends on the product.
Can PU stone panels be installed outdoors?
Some PU stone panels are specifically designed for exterior applications. Always confirm exterior suitability from the manufacturer’s technical documentation before installation.
Can PU panels be installed on concrete?
Yes, provided the concrete surface is stable, clean, properly prepared, and compatible with the selected installation system.
Can PU wall panels be installed over drywall?
Many PU decorative panels can be installed over suitable drywall surfaces, but the substrate must be structurally sound and able to support the installation system.
How do you cut PU stone panels?
Depending on the product construction and thickness, suitable utility knives, saws, or other cutting tools may be used. Always test the chosen cutting method on a sample first.
Do PU stone wall panels require grouting?
Not always. Some products are designed as decorative panels with minimal or controlled joints, while others may require joint treatment for the desired appearance.
How do you repair a damaged PU stone panel?
Minor damage may sometimes be repaired with compatible filler, coating, or touch-up materials. For larger damage, replacing the affected panel may provide the best visual result.
Final Checklist Before Installation
Before starting a PU stone wall panel project, make sure you have checked:
☐ Wall surface is clean and stable
☐ Moisture problems have been resolved
☐ Correct panel quantity has been calculated
☐ Layout has been planned
☐ Adhesive is compatible
☐ Cutting tools are ready
☐ Corner details have been planned
☐ Joint treatment has been tested
☐ Outdoor suitability has been confirmed, if applicable
☐ Mechanical fixing requirements have been checked
☐ Samples have been approved for large projects
PU Stone Wall Panels from FOROREE
FOROREE focuses on PU wall panels and PU stone wall panels for residential, commercial, and architectural decoration markets.
Our product range can cover both traditional stone-inspired designs and modern decorative styles, helping importers, distributors, contractors, and project buyers select suitable solutions for different markets.
For professional buyers, we can support:
PU Stone Collection
Stone, rock, stacked stone, brick, slate, mushroom and other stone-inspired designs.
Modern PU Wall Panels
Geometric, 3D, contemporary and decorative PU wall panel designs.
Interior & Exterior Applications
Product selection for villas, feature walls, commercial spaces, hospitality projects, gardens and exterior decorative walls, subject to product specifications.
OEM & ODM
Private-label packaging, product development, colors and project-based customization.
Distributor Support
Samples, product information, marketing images, installation guidance, packaging solutions and container planning.
Looking for a PU Wall Panel Manufacturer?
Explore the FOROREE PU wall panel collection or contact our team for product samples, technical information and wholesale quotations.
FOROREE — The PU Wall Panel Specialist
Realistic Stone. Modern Design. Lightweight Installation.